Update : 2024.04.13
Software : Questa*-Intel® FPGA and Starter Editions
of Intel® Quartus® Prime Standard Edition Design Software Version 23.1 for Windows
Intel® Quartus® Prime Standard Edition Design Software Version 23.1 for Windows
Intel® Quartus® Prime Standard Edition Design Software Version 23.1 B991 for Windows
www.intel.com
On this page, you will download the most recent version of the software's Windows version.

First, ModelSim is not supported on Windows 11. In addition, ModelSim is no longer updated and Questa has been newly released. It also supports SystemVerilog for OVM/UVM, which was not supported by ModelSim. So we're going to install Questa*-Intel® FPGA and Starter Editions in Individual Files.
Maybe after installing it like this, it won't work (?).
This is because environment variables are not set.
License data is first required to set environment variables. Below is how to issue licenses for setting environmental variables provided by intel. Let's try to catch up.
Follow these steps to generate the license:
www.intel.com
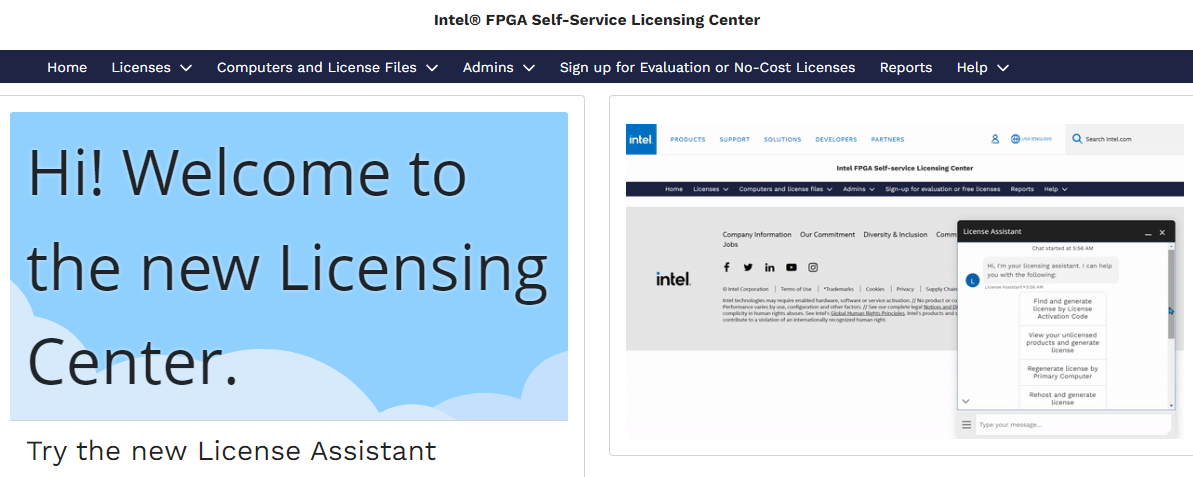
1. Go to the Intel® FPGA Self-Service Licensing Center (SSLC).
- You must first subscribe to Intel for this task.
- Sign up and enter the MS account with the same mail account (maybe it's because I use Azure Cloud)
2. Select the Sign up for Evaluation or Free Licenses option on the menu bar.
- The latest screen appears as follows, and click Sign up for Evaluation or No-Cost Licenses.
3. In the list of products displayed, select the Questa* Intel® FPGA Starter Edition SW-QUESTA option.
- Choose Questa* Intel® FPGA Starter. His license is SW-QUESTA.
4. Under the # of Seats column, enter the number of seats you require.
5. Read the license terms of use.
6. Select the "I have read and agree to the terms of use of this license as listed below" check box.
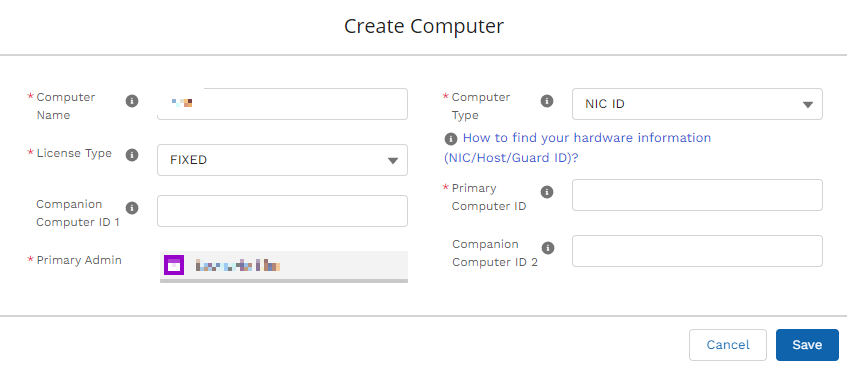
7. Click Get License. A popup window displays asking you to which computer should the license be assigned. You can use one of the following options:
- Option 1: Click Create a New Computer if you want to assign the license to a new computer. You must provide information about the required hardware and license type. For information about the license type, refer to Intel® FPGA Software License Types. For information about how to extract information about your computer hardware, refer to Hardware Information Required When You Request a License.
- Option 2: Click Assign an Existing Computer and search for the computer name/NIC ID that you have created previously in your My Intel® account. To view your list of computers, use of the following options:
- Visit the License Assistant and select Regenerate License by Primary Computer > View all computers and select.
- On the SSLC menu bar, click Computers and License Files and select the desired option.
- You must register your computer when you create the license. It's the window below, and the computer name can be the account name.
- For License Type, FIXED is recommended for personal computers.
- Computer Type recommends NIC ID (Network Interface Card).
- In the primary computer ID, enter the physical address of the last paragraph, which can be identified as ipconfig /all, in succession, and only the alphabetic and numeric characters.
8. Click Generate. You receive an email with the license attached to your registered email address.
9. Save the license.dat file on your computer (for example, ~/intelFPGA_pro/LR-xxxxxx_License.dat).
When you complete all of the above process, you will get license data by mail! Please download that file.
When you place the license LR-xxxxxx_License.dat file in the folder where Questa was installed and search Windows for System Environment Variables, the System Properties\Advanced\Environment Variables appear immediately. First, please check if there is a system variable named LM_LICENSE_FILE. After that, make a new (W) in the system variable (S).
Variable name is LM_LICENSE_FILE
For variable values, you can enter the license file path.
In my case, it's like this.
C:\intelFPGA\LR-****_License.dat (* enter the file name as it is)
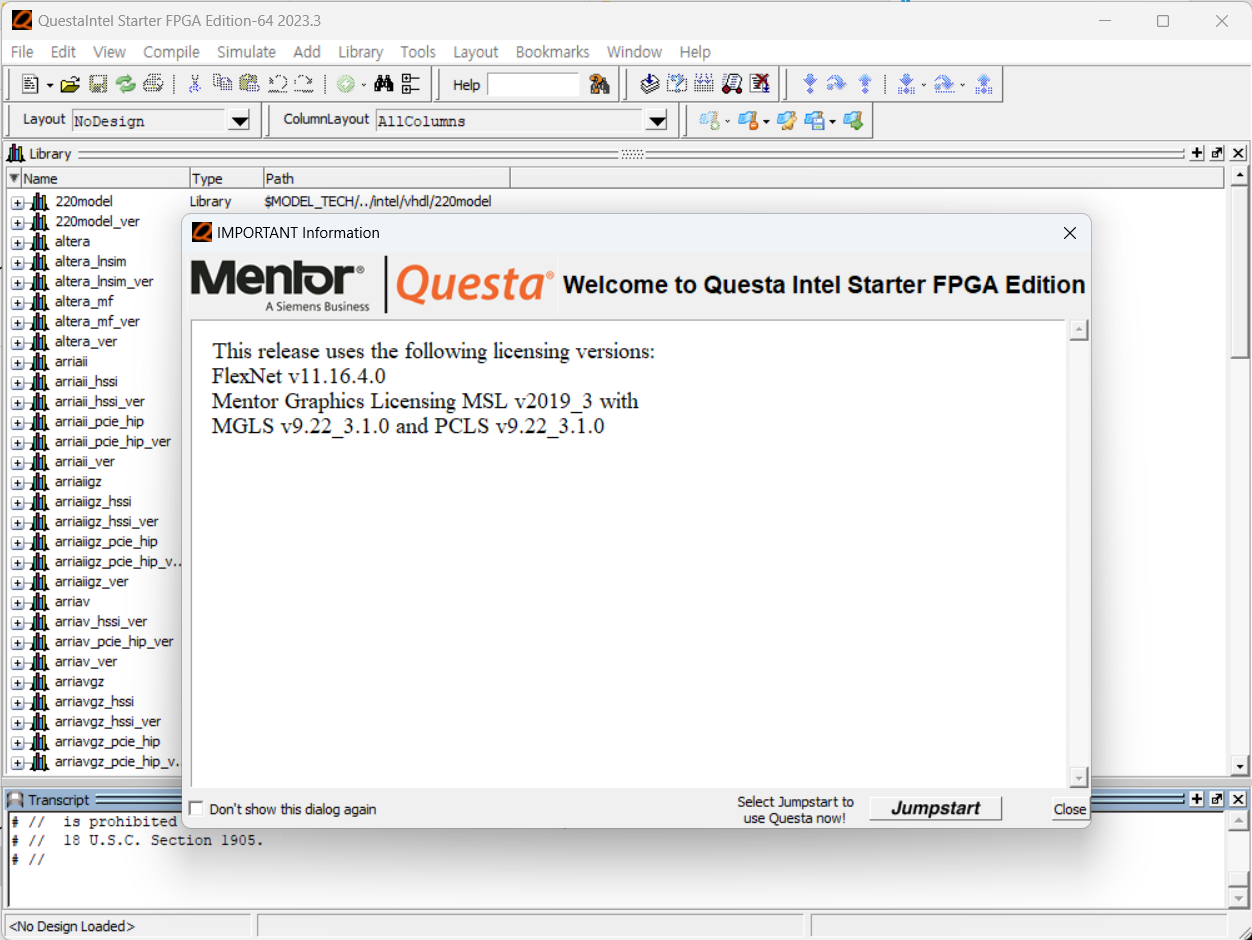
If you complete setting the environment variables and run Questa again, you can see that it appears well as below!
'Computer > Setting' 카테고리의 다른 글
| [Github] 프로필 README.md 설정하기 (0) | 2024.05.10 |
|---|---|
| [Questa] 윈도우 11에서 Questa / ModelSim 설치 방법 (Kor) (0) | 2024.04.13 |
| [IT팁] 노트북(gram) WOL 설정하기 (0) | 2024.03.27 |