반응형

Update : 2024.06.25

Contents : Python Comment short & long


실제 코딩 결과 및 예제는 맨 아래 링크에 있습니다.


오늘 이야기하고자 하는 것은 짧은 주석과 긴 주석을 어떻게 넣는 것인지입니다.


# 짧은 노트는 이렇게 넣으시면 됩니다.

'''
이후 print 이야기할 때도 그렇지만
"""(큰따옴표) 혹은 '''(작은따옴표) 3번을 양끝에 입력하면 됩니다.
'''
 

단, 주의할 점이 하나 있습니다.

주석을 포함한 Python의 모든 문장은 들여쓰기 (indent)를 주의해야 합니다.

주석이라고 하여도 문장 안 혹은 함수 안에 있는 긴 주석이라면 들여쓰기를 해야 합니다.

컴퓨터가 인식할 때 문장 구조를 다르게 인식하기 때문입니다 (중간에 함수가 끝난 것으로 생각 등).


입력한 내용이 실제로 어떻게 적용되는지는 아래 링크에서 확인할 수 있습니다.


https://colab.research.google.com/drive/1uSgy2cApBc0Vlt0ZDqa-jwzmWMz3TBAT?usp=sharing


0.01 py_basic.ipynb

Colaboratory notebook

colab.research.google.com


참고 문서 : https://docs.python.org/3/tutorial/index.html


The Python Tutorial

Python is an easy to learn, powerful programming language. It has efficient high-level data structures and a simple but effective approach to object-oriented programming. Python’s elegant syntax an...

docs.python.org


도움이 되셨다면 공감 및 많은 관심 부탁드립니다.

궁금한 내용은 댓글 또는 메일로 주시면 됩니다.

본 게시물을 사용하여 무단으로 영리행위를 하는 것을 금합니다.

무단 수정, 무단 배포를 금합니다.


반응형

'Programming > Python' 카테고리의 다른 글

[Python]의 기본 구조 : 키워드, 식별자  (0) 2024.06.25
반응형

Updates : 2024.06.25

Contents : Python 프로그래밍의 기본 구조

실제 코딩 결과 및 예제는 맨 아래 링크에 있습니다.

파이썬 프로그래밍은 3단계로 구성되어 있습니다.
간단한 코드들을 expression이라 부르며
expression들이 모여 statement를 이루고
statement들이 모여 프로그램(program)을 만듭니다.

파이썬 프로그램을 작성할 때 가장 기본이 되는 구성요소가 키워드, 식별자, 함수라고 볼 수 있습니다.
키워드 : 파이썬에서 정해둔 특정한 역할 혹은 값을 가진 요소들
식별자 : 사용자가 정의하여 변수들을 저장하거나 계산하는 요소
함수 : 특정 매개변수에 대한 인자값을 받아 특정 역할을 수행한 후 특정 값을 반환하는 요소
라고 간단하게 설명할 수 있습니다.

함수는 이후에 천천히 익힐 것이므로, 키워드는 무엇이고 식별자는 무엇인지 살펴보겠습니다.

키워드 (keyword)
파이썬 에디터에 아래와 같이 입력하면, 키워드 목록이 출력됩니다.

# keyword 목록
import keyword
print(keyword.kwlist)

출력값
['False', 'None', 'True', 'and', 'as', 'assert', 'async', 'await', 'break', 
'class', 'continue', 'def', 'del', 'elif', 'else', 'except', 'finally', 'for', 
'from', 'global', 'if', 'import', 'in', 'is', 'lambda', 'nonlocal', 'not', 
'or', 'pass', 'raise', 'return', 'try', 'while', 'with', 'yield']


2. 식별자 (identifier)
식별자는 말 그대로 사용자가 사용하는 값을 저장하는 '특정' 요소라고 생각하면 됩니다.
이러한 값들이 어떤 역할을 하는지 알기 쉬워야겠죠?
그래서 아래와 같은 4가지의 규칙이 있습니다.
1) 키워드가 아닐 것 (키워드와의 충돌 방지)
2) 숫자로 시작하지 말 것
3) 특수문자는 _만 사용할 것
4) 공백을 포함하지 않을 것

그리고 이러한 식별자들을 설정하는 2가지 방법이 있습니다.

# identifier snake_case
identi_klue = 7

#  identifier Camelcase
IdentiKlue = 10


입력한 내용이 실제로 어떻게 적용되는지는 아래 링크에서 확인할 수 있습니다.
https://colab.research.google.com/drive/1uSgy2cApBc0Vlt0ZDqa-jwzmWMz3TBAT?usp=sharing


0.01 py_basic.ipynb

Colaboratory notebook

colab.research.google.com


참고 문서 : https://docs.python.org/3/tutorial/index.html


The Python Tutorial

Python is an easy to learn, powerful programming language. It has efficient high-level data structures and a simple but effective approach to object-oriented programming. Python’s elegant syntax an...

docs.python.org


도움이 되셨다면 공감 및 많은 관심 부탁드립니다.
궁금한 내용은 댓글 또는 메일로 주시면 됩니다.

본 게시물을 사용하여 무단으로 영리행위를 하는 것을 금합니다.
무단 수정, 무단 배포를 금합니다


반응형

'Programming > Python' 카테고리의 다른 글

[Python] 주석 길게 넣기 (comment)  (0) 2024.06.25
반응형

Updates : 2024.04.23

Contents : Llama 3 오리지널 모델의 실행 방법입니다. Hugging-face 실행 방법 아닙니다!

                   Run the open source code of Llama3 without using huggingface but original model.


"The English guide is embedded in italics throughout the document."


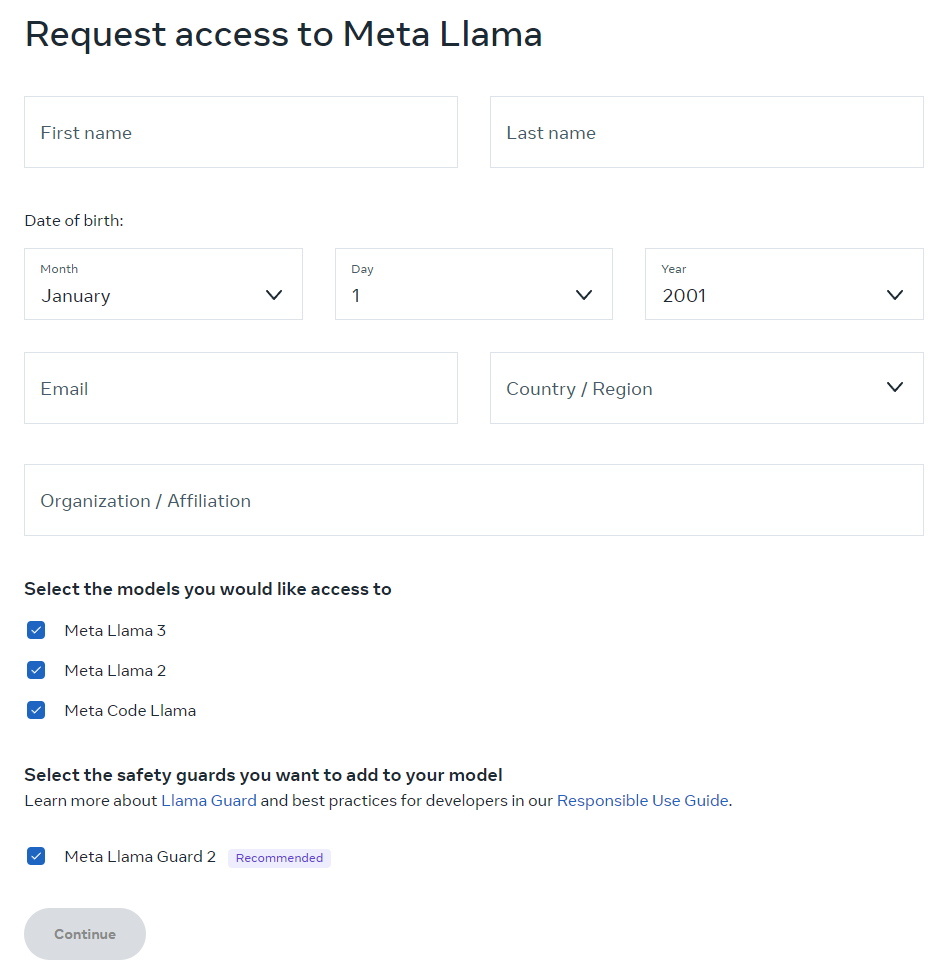
Llama 공식 사이트로 들어가서 엑세스 허가를 먼저 받아야 합니다.

Go to the Llama official website and request access of Llama3


https://llama.meta.com/


Meta Llama

Meta Llama is the next generation of our open source large language model, available for free for research and commercial use.

llama.meta.com


위 사이트의 "Download models"를 클릭하세요

click "Download models"


양식 채우시고 이후에 나오는 모든 내용에 동의해주세요.

Fill the form and accept all and continue.


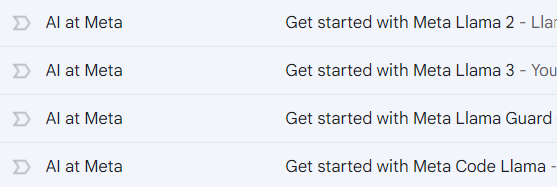
이제 이후에 모델을 다운로드 받을 때 사용할 URL을 받게 되는데, 이거 사이트 주소 아닙니다.

모델을 다운로드 받을 때 주소를 입력하라고 하는데, 그 때 사용되는 키입니다.

Then, we can get URL code (not using it as URL, it is the key for downloading tokens of the model).


라마 깃헙에 가서 모델을 다운 받고 weight도 다운받습니다.

아래 command 순서대로 따라하시면 됩니다.

Let's go to Meta's github. Run Llama3.


https://github.com/meta-llama/llama3


GitHub - meta-llama/llama3: The official Meta Llama 3 GitHub site

The official Meta Llama 3 GitHub site. Contribute to meta-llama/llama3 development by creating an account on GitHub.

github.com

# CLI Command (terminal)
git clone https://github.com/meta-llama/llama3
cd llama3
pip install -e .
bash download.sh

# 다운로드 엑세스 URL을 넣으라고 나옵니다. 
# 이 때 메일에서 받은 URL을 복사해서 그대로 넣고 enter하면 됩니다
# put the URL code after the comment said put on it!
# after download, run it

# example
torchrun --nproc_per_node 1 example_chat_completion.py \
    --ckpt_dir llama-2-7b-chat/ \
    --tokenizer_path tokenizer.model \
    --max_seq_len 512 --max_batch_size 6
반응형
반응형

Updates  : 2024.04.25

Contents : Linux 환경 위에서 Nsight Systems 그리고 Compute 설치 및 세팅

                   Install and set Nsight Systems on Docker or Linux 


"The English guide is embedded in italics throughout the document."


# NVIDIA Nsight Systems 설치
# To install NVIDIA Nsight Systems, execute the following commands:
wget https://developer.nvidia.com/downloads/assets/tools/secure/nsight-systems/2024_1/nsightsystems-linux-public-2024.1.1.59-3380207.run
bash nsightsystems-linux-public-2024.1.1.59-3380207.run

# To uninstall the Nsight Systems 2023.4.1, please delete "/opt/nvidia/nsight-systems/2023.4.1"

# 만약 nsys 명령어가 설치 후 작동하지 않는다면,
# if nsys command not found,
echo 'export PATH="$PATH:/opt/nvidia/nsight-systems/2024.1.1/bin"'
source ~/.bashrc

# 만약 실행이 이상하다면 아래 명령어를 통해 확인해보세요
# To check the environment status:
nsys status --environment
# NVIDIA Nsight Compute 설치
# download install file from NVIDIA Nsight Compute
# 전체 roofline 차트를 보기 위해 compute 설정을 하는 방법입니다
# To view comprehensive roofline charts, modify the configuration file:

path : /root/Documents/NVIDIA Nsight Compute/2023.1.0/Sections/SpeedOfLight_Hierarchical*RooflineChart.section

# 아래와 같은 위치에 그 아래 코드 부분 추가
# Add the following code block after the existing one:

Identifier: "SpeedOfLight_HierarchicalTensorRooflineChart"
DisplayName: "GPU Speed Of Light Hierarchical Roofline Chart (Tensor Core)"
Extends: "SpeedOfLight"
Description: "High-level overview of the utilization for compute and memory resources of the GPU presented as a roofline chart."
Order: 12
Sets {
  Identifier: "roofline"
}

Sets {
  Identifier: "full"
}
[pdb, ncu 사용해서 trace & flops, bw 확인]
Using Nsight Compute with Python Debugger (pdb)

# ps -fA 로 현재 사용중인 사람 확인
# import pdb; pdb.set_trace()
# ctrl + k + c / ctrl + k + u 활용
반응형

+ Recent posts